Friday, April 19, 2013

Elizalex #2-Red and White Cotton

These photos came out a bit blurry, but cute dress, right? 


Here we have my Elisalex number two.  Again in cotton, this time with a more fitted (and slightly adjusted) bodice.  It is still a bit small in the chest, but not a major problem.  I love how this dress turned out.  So pretty and sweet for summer.  These pictures were taken on my birthday morning.  Don’t I look happy?  :)
I have made a few more, so get ready!  Each one gets a bit better.  Yay for this awesome pattern! 

Elisalex #1- White dress

Meet the Elisalex Dress pattern from a new startup company, By Hand London.  The company has only one other pattern, but it is also pretty darn cute (a pencil skirt with a flounce). 

The Elisalex is a really wonderful pattern, especially the top, which looks great with a full gathered skirt instead of the skirt pattern provided (more on that in a future post).  I have made several pieces from this pattern since I got it in the mail last month, all with very different results.
The first dress is made out of soft white cotton.  This is the only one I added sleeves too.  I used pretty hand made bias tape from Merrigoroundandme on Etsy (most of my bias tape comes from this Etsy shop-I for sure recommend!)  to accent the neck and the sleeves.  I also did a pretty great job adding the zipper by machine, if I do say so myself. 


I really like the final result, but I made it a bit too big!  I don’t mind having a little extra room, but I did hope it would be a bit more fitted.  I find that most patterns are a little bigger than they say in their measurements table.  But if I size down, my boobs may end up getting squished.  By Hand London does have a nice “full bust adjustment” tutorial on their blog, but I just adjusted a bit for my second go at this dress (next blog post) by eye-balling.  I could probably still benefit from a little extra room in the chest on that one, but eh, that's what I get for being lazy. 
I also made this version with a full gathered skirt.  The skirt that the pattern came with is really cute, but I have had no luck recreating it (more on that soon).  No matter however, because I prefer a full skirt.  I also did something a little special with the skirt.  I took one long piece of material and left it folded at the bottom.  Then I gathered the open side with the piece still folded so that the bottom of the dress is just one piece.  I did this as a way of lining the dress, while also giving it a slightly different drape.  It's not very noticeable, but I still think it is cool. 
I highly recommend this versatile pattern.  I have made a lot of versions now, and I see no end in sight!  I’ll post my second version this afternoon.  Yay! 


Tuesday, April 16, 2013

Outfit Post: Gold And Black Is Where Its At

Today I bring you an old fashioned outfit post featuring this cool gold and black top I just got from Modcloth.  My awesome cousins sent me a birthday gift card and this is the result!  I paired it with a soft blazer from Urban Outfitters and some black pants from GAP (I have had both for years).  As for shoes, I am wearing some thrifted red and black vintage kitten heals.  These photos are from yesterday before work.  Don't I look professional (and a bit sleepy)?       


And now I hear you saying, "Nicole, please feature more pictures of your hair, preferably taken by you , sitting in a car on the way to work."  Well, if you insist.  It's grown so much since November!  I can't wait until this time next year.  It is going to be crazy long by then!


So there you have it.  Thank you Kelsey and Carlyn for my great shirt (and part of my velvet bathing suit-a post for another day)!  You are awesome cousins.  :)

Monday, April 15, 2013

PANTS!!!! I MADE PANTS!!!!!!!!!!!!!!!!!

Admittedly, these are not Glamour Shots.  I was sewing my little heart out (so many, many projects in the works!) when I caught my husband and made him take a break from doing his own projects (car guy) to take a few quick pics before he disappeared back into his cave garage.  An elusive husband-sighting is rare on project days so I had to act quickly, and although I found time to add heals to these shots, I obviously couldn't be bothered with things like brushing my hair.  But the point is...I made pants!  Lots and lots of pants.  And they are glorious.

Eventually I will try to write a nice post about each pair and show how I would actually wear them, but for now I just wanted to show off the fact that I did it!!!!  I cracked the magic pants code!  Hurray!  I am AWESOME!!!

First up, we have my first successful (meaning I can zip them) pair of Clovers from Colette patterns. 

Great job, right???  Those who have been following my blog for a while may remember that I have been trying to make a pair of Clovers for some time with pretty bad results (meaning-they didn’t fit).  Finally, I tried again, this time in denim, and they turned out great-as you can see.  I have my shirt pulled up in a weird way so that you can get the full effect of the waistband, which has been my nemesis these many months.  I have also made a less fitted version of these in green plaid, which I will share as soon as I add pockets.  I would also love to use this pattern to make gym pants soon.  They were a bit tricky for me to figure out (understatement of the year), but now that I have, I will for sure be making these again and again. 
And now it is time for an awesome butt shot to show you that I added pockets!  Yay!  Pockets are essential to pants construction because they make it so that you can see a little less of a persons actual butt shape, and so that you can get away with wearing full-butt underwear without having pantie-lines mucking up the look.  Yes sir, these pants are the real deal.  I plan on making more (that actually fit for realz-these are just a tiny bit snug still). It is true.  I fell madly in love with my new Clovers...

BUT THEN...

I met butterick 5895 (sexy name, no?) and I finally knew the meaning of true pants love!  The most amazing part-the fit of these pants is just so so good without any adjusting at all! I made these beauties on my first try!  Ahhhhh!!!!!  Too awesome!!!!!
This pattern was really amazing, and easy.  I can’t wait to make more in dark denim!!!  I didn’t do a butt shot of these, but they make my butt look great (really I have a great butt anyway, not going to lie).  I didn't even have to add pockets!  Although maybe if I was a bit less lazy, I would go back and add them later.  Hummm... 
I will certainly make these pants again.  I would love to figure out how to use this pattern, but make it a bit less high waisted.  I really love this fit looks wise, but it is not the most comfortable for every day pants. Creepy smile in 3, 2...
Now for more smugness...

And next...

I made them again in a thick cotton.  Ugh.  These are so pretty.  I used bias tape as a detail and it came out great.  The pictures my husband took turned out too badly to post here, so I am posting these awful shots that I took myself, but you get the idea.  These pants deserve their own post one of these days, so hopefully I will make that happen. 
So as you can see, I am now a skilled pants maker.  Most pants patters are marked "easy" and I must say, that is a lie.  BUT, if you can adjust the fit to your liking (this step must be changed with each new material you use depending on stretch), then you can quickly make them again.  Pants also take very little fabric, which is nice since pants appropriate materials tend to be a bit more spendy than your basic cotton or rayon. 


So to sum up: I made pants.  I am the best ever.  The end. 

Thursday, April 4, 2013

Hot Pants-Quick Outfit Post

While I am still struggling with making pants (more ill fitting pairs have been made and discarded since the last time I blogged about it-maybe one good pair to be blogged soon!) I am still trying to figure out why I am bothering to keep trying in the first place.  I have a lot of cute pants already, and I can't imagine hand made pants ever being that great, unless you were just amazing at sewing.  Also, the material is expensive.  Also, I almost never wear pants.  Sigh.  Once I get one pair totally right, I am done.  Done I tell you!

In the mean time, I took this photo a few weeks back of these great hot pink Gap pants paired with this beautiful hand-me-down top from my bestie.  I got a ton of compliments that day!  I have had these pants for a long time, and worn them a lot, but for some reason, this was the day people finally noticed them.  It's not like they were hiding (they are hot pink for gosh sakes!) but never the less, I was happy to get the compliments.  Duh. 


Tuesday, April 2, 2013

Growing Out The Pixie: Month Number Five

I am getting more and more excited about growing my hair out.  I think it should be long enough to put in little pig tails by late summer!  When it is long enough for that, I will feel like I have really long hair!  Haha!  I am so ready for a change.  Here I am in 2011 with mini pigtails.  :)

So here is what it looks like now, month 5 of growing it out.  It is a pretty hit or miss length, and it is already a lot more work to make it look nice than my super short hair was.  But, it is past my jaw, which I see as the third stage of growing your hair out. 
The top photos are from march 29th, but that is basically April.  The bottom two are from April 1. 

Here are the stage milestones of growing out a pixie hair cut:
1)      Start growing it out-you may trim up the back as necessary to prevent a mullet (This was in November for me this time). 
2)       The front of your hair is past your earlobes (month 3-February).
3)      The front of your hair is to your jaw (month 5-April).
4)      The front of your hair is to your chin (month 7-June).
5)      Mini pigtails (month 9-August)
6)      Mini pony tail (month 11-October)
7)      Hair to shoulders (month 13-Dec)
8)      Hair past shoulders (month 15-Feb 2014)
9)      Long hair!  March 2014!
So there you have it!  My hair should be really long (for me) by this time next year.  Whoopee! 

As a side note, it is really hard to find long hair inspiration because models always look so mad and bored and I want to find happy ladies with long hair.  Not like this: 
Like this:   

Also, I like this.  I am going to pretend this girl is smiling.  She should be, her hair is so pretty!  :)


*PS- the above photo is sooo pretty, but doesn't it also look a bit like a dead body propped up in a chair?  Just me?  Okay fine. 

Monday, April 1, 2013

Pencil Skirt- My first Pattern From Gertie's New Book!

I have been sewing up a storm lately.  Some misses, but even more hits!  The first super awesome hit I'd like to share is my first attempt at a pattern from Gertie's New Book For Better Sewing.  Introducing: the pencil skirt. I wore this for a birthday dinner with my folks and luckily remembered to take some photos after.


I'll do a full book review soon (it is a wonderful sewing/fashion book and deserves its own post), but the point I want to drive home today is: yeah, this skirt is awesome.  It was fairly easy to make and, although I did have to make a few adjustments, I was very pleased with the sizing.  A lot of patterns end up being way too big when you go with the measurements they suggest (vanity sizing exists when you make your own clothes too I guess), but I cut this skirt out according to the sizing in the book and it was really spot on.  Yay!
That is yet another reason why I love this book; the patterns were drafted under the assumption that your hips are quite a bit wider than your middle, which is just how I am built (there is a 12 inch difference between my waist and my hips/big 'ol butt)!  I might have to adjust a bit for the top of patterns(the patterns were made for B cup) but that is a lot easier than widening the hips (in my opinion). 
Top: The Loft.  Skirt: made by me!  Necklace, birthday present from my sis.  I was wearing the pin because it was my birthday.  Also, that pretty chair was a birthday present from my folks.  :)

Now you are saying to yourself, “Is that a Kegerator behind her?  If so, that is so awesome!  I thought Nicole was a huge nerd, but now I see that she has mad street cred.”
And to you I say, yes, I do have a Kegorator behind me...that belongs to my husband.  Although I would like to be thought of as cool by association please. 
And now, here is the skirt lining.  Nice, right?  I am getting used to underlining, which is a new skill that I learned from Gertie’s New Book For Better Sewing, but I have already used it for other pieces to add body to the fabric.  Yay for adding to my learning library! 


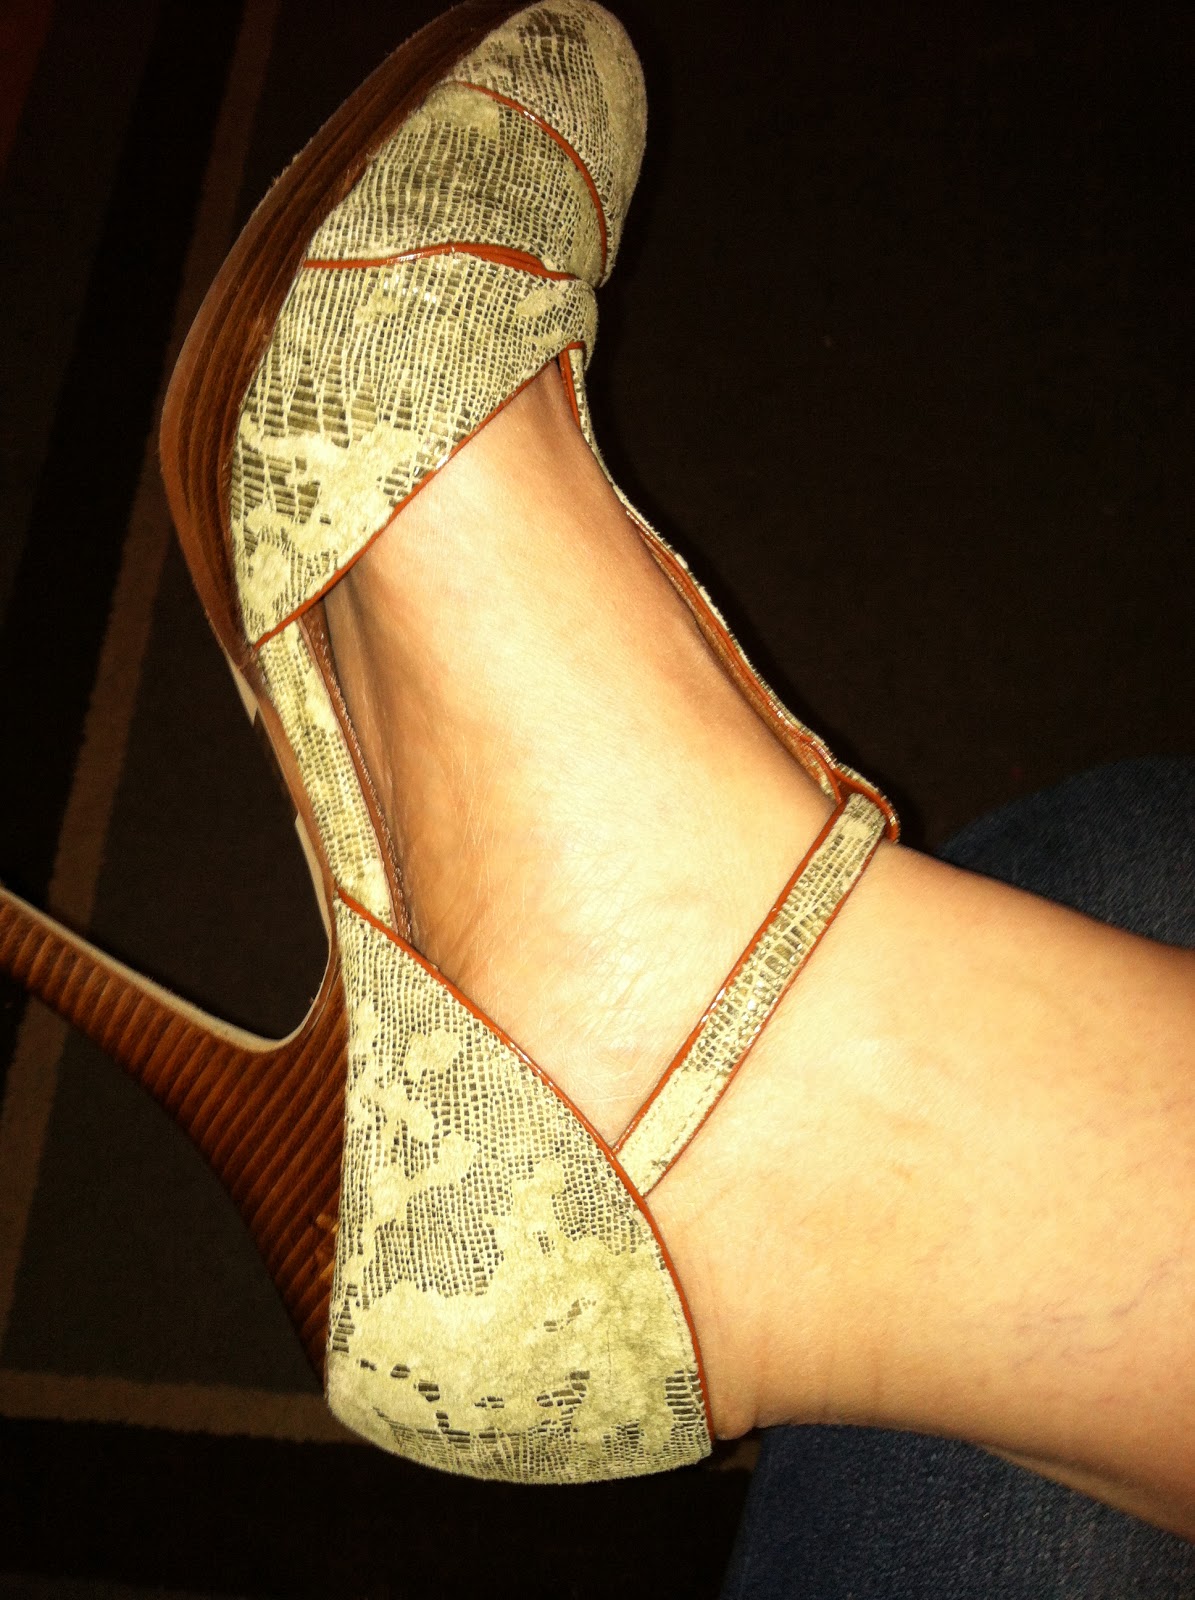
Lastly, marvel at these shoes.  My bestie Rachel Browne sent them to me as a birthday present and they came just in time!  The heals are insane but they were surprisingly comfy and I love them.


So there you have it, a beautiful pencil skirt.  I can't wait to make more! 

Stay tuned this week to see what other goodies I have been working on.  I know, how can you possibly wait????